About Localization
DNN Version: 09.02.00
• 3 minutes to read
• 3 minutes to read
DNN comes with a built in framework for localizing your content, The overall process involves you designating a default language and then adding additional languages. For each additional language you can perform translation tasks like creating new resources and marking pages for translation.
Setting Up Your Site for Localization
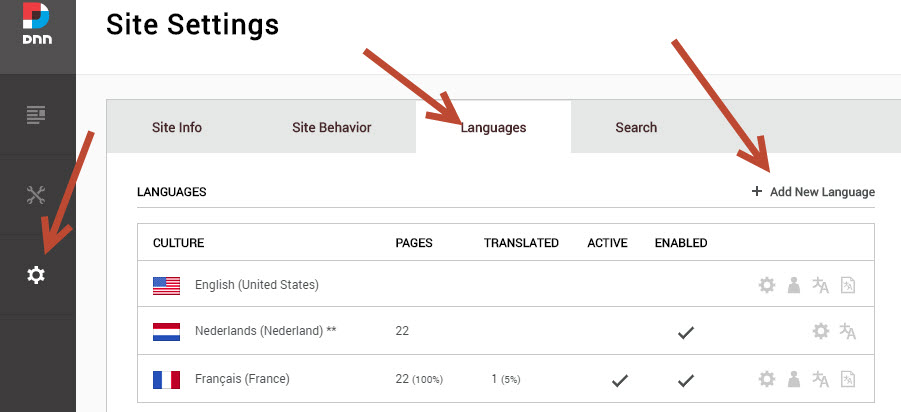
Step 1: Add a Language of Your Choosing
- You can access the add language dialog under
Settings-Site Settings-Languages. Click the+ Add New Languagebutton.
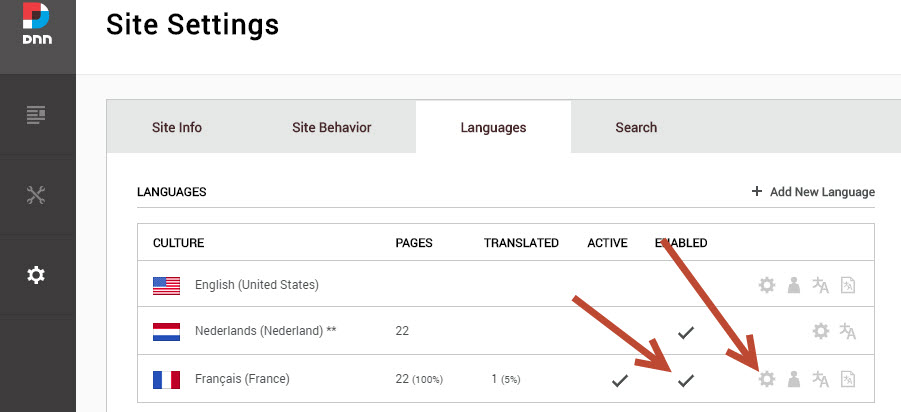
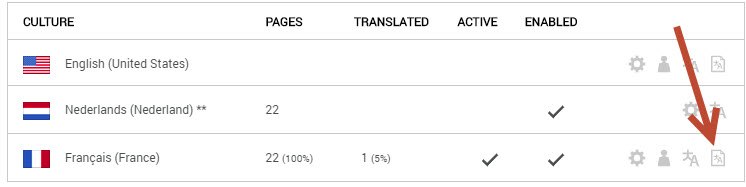
Step 2: Verify the New Language is Enabled
- This is marked with a check mark. If not, use the cog icon to enable the language.
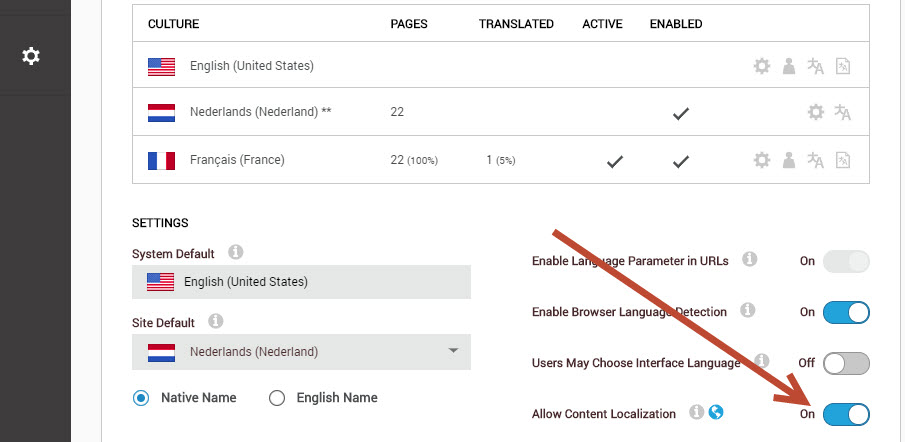
Step 3: Enable Content Localization
- It is recommended to flip the radio button
Make All Pages Translatableon because this will make unique copies of each page that represent the translation of that page.
Warning
The default language can not be changed afterwards.
- You can now visit your pages and start localizing content. As an admin, you'll find the language switcher most of the time (depending on the theme) at the right top of your screen.
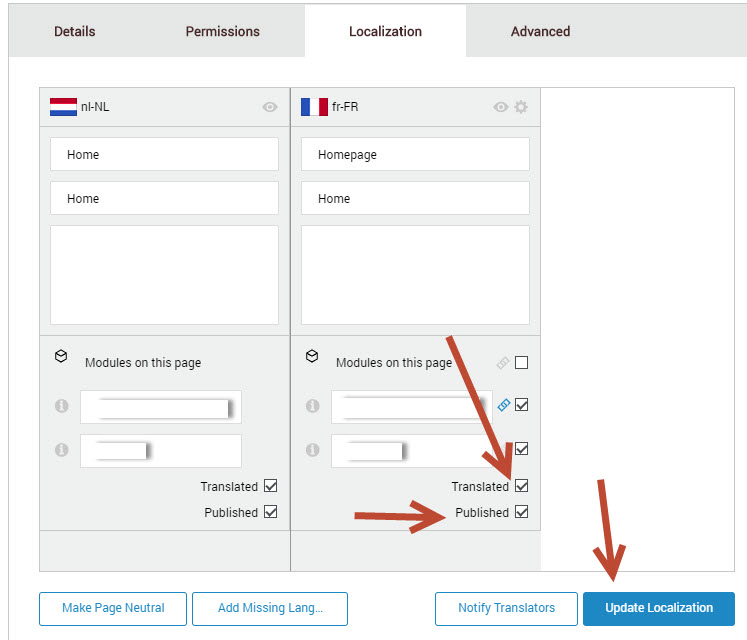
Step 4: Translate a Page
- Now that you have translatable versions of each page, a new
Localizationtab has been added underContent-Pagesfor each page. - Once you have finished translating the page via the language specific version, mark your translated page as 'translated' and give it a go (if you desire) to be published.
Step 5: Activate Your Language
- The last step is to activate your language. Go to
Settings-Site Settings-Languagesand click the icon that stands for multi language.
- In the new window, flip the
Activate Pages In This Languageon to activate your pages.
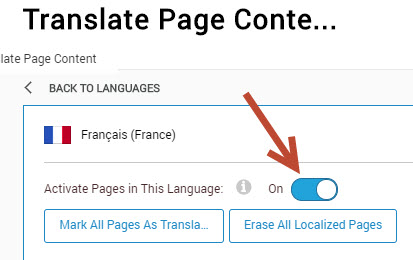
- This last step allows you as a content manager to prepare all the work for a new language and publish after everyone involved has approved.
If this still does not show your translated content, verify if you are using a module that needs language activation as well.