Install and Set Up SQL
Steps
Install SQL.
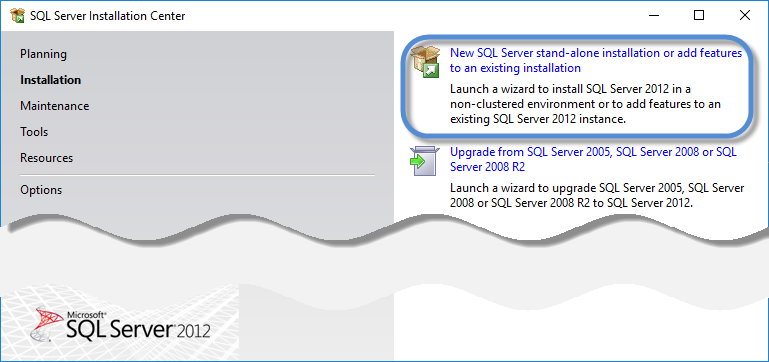
Choose New SQL Server stand-alone installation....
Include any product updates.
Accept the defaults in Feature Selection, Instance Configuration, and Server Configuration.
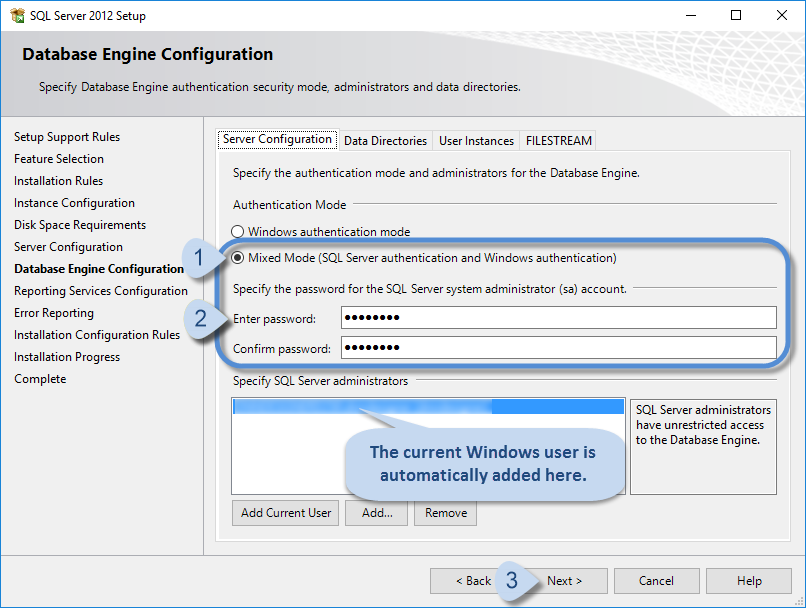
In Database Engine Configuration, under Authentication Mode, choose Mixed Mode.
Accept the defaults in remaining dialogs.
Create a SQL database for your website.
Start the Microsoft SQL Server Management Studio app.
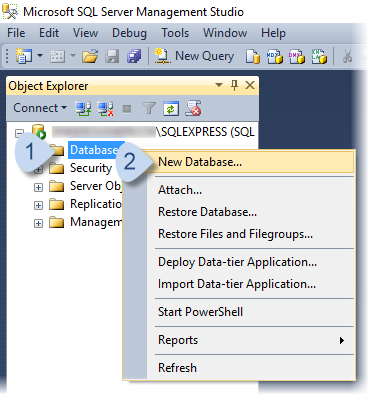
In the Object Explorer panel, right-click on Databases, and choose New Database....
Enter the name of the new database. Click/Tap OK.
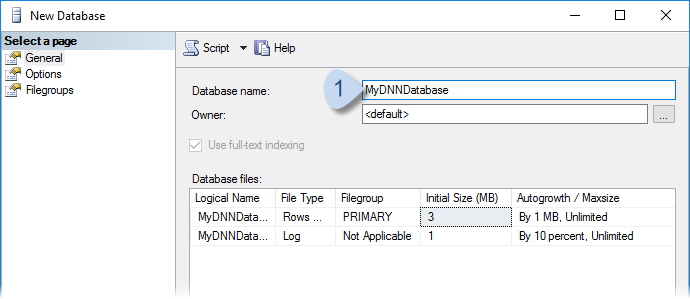 Note: Remember the database name, because it will be required by the DNN Installation Wizard.
Create a SQL user account.
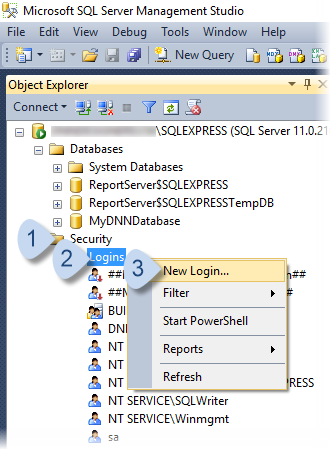
Under Security, right-click on Logins, and choose New Login....
Enter the username, choose SQL Server authentication, add a password, uncheck Enforce password policy, and choose the database.
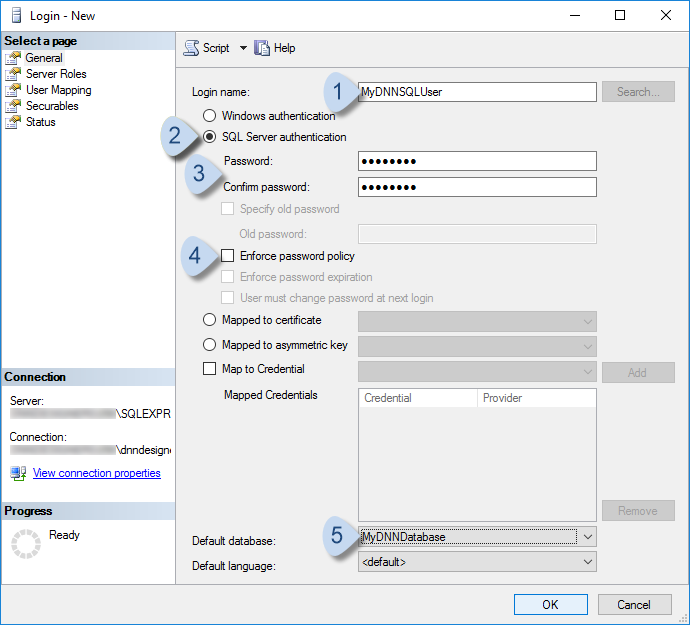
Note: Remember the username and password, because they will be required by the DNN Installation Wizard.
Give the new SQL user db_owner access to the new database.
In the Object Explorer panel, under your database > Security, right-click on Users, and choose New User...
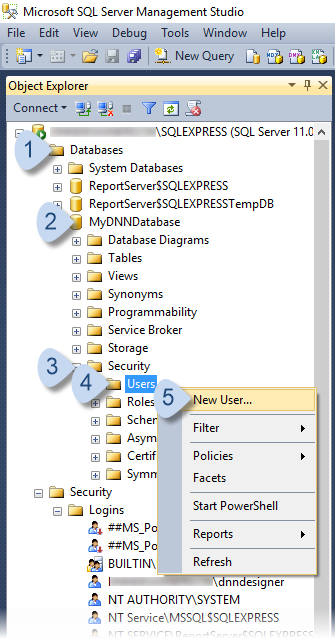
Set User type to SQL user with login.
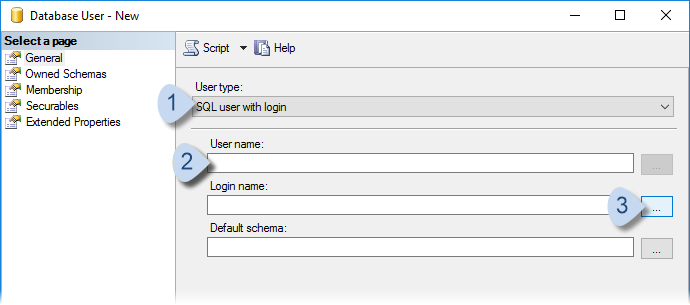
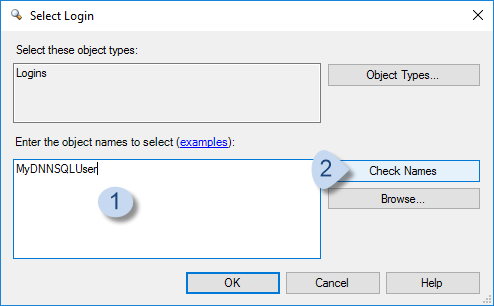
Enter the username of the account you just created, then click/tap Check Names.
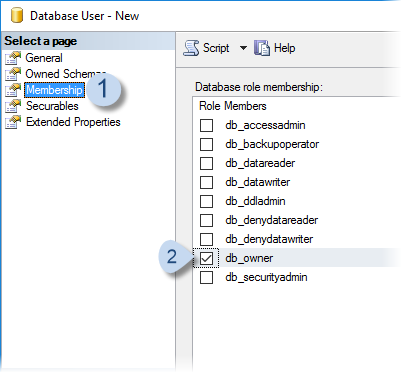
Under Select a page, select Membership, and check the db_owner database role membership.
