How to implement SMTP using OAuth with Microsoft 365
Introduction
This page describes the necessary steps to make SMTP work using OAuth with Microsoft 365.
Setup steps
- Check some settings in DNN
- Create a mailbox in M365 Exchange
- Create an APP registration in the M365 Azure
- Grant access to the app to use the mailbox
- Setup the mailbox in DNN
1. Check some settings in DNN
Warning
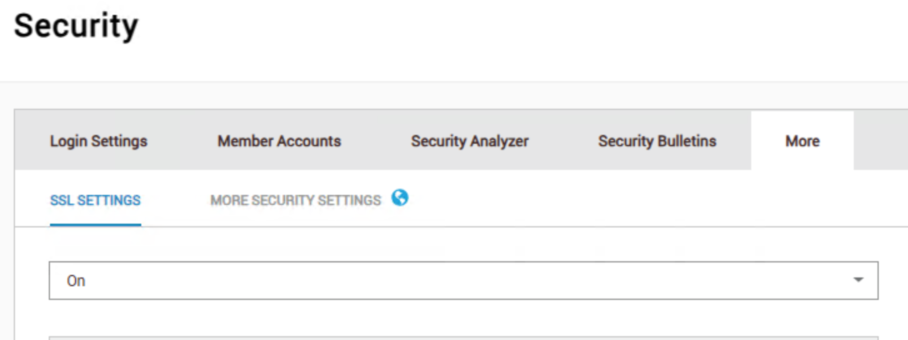
To avoid errors with the authentication in step 5, make sure that the SSL settings are correct. It must be set on ON.
Personabar - Security - More - SSL Settings: Make sure that SSL Settings = ON

Personabar - Security - Login settings: Check the site administrator account. You need to use this e-mail address in M365, because the site administrator is the sender.
2. Create a mailbox in M365 Exchange
- Create a mailbox with a licence. Use the address of the site administrator.
- As Admin => Userdetails - E-mail - E-mail apps: In the account settings ensure that the option Verified SMTP is enabled.
Note
In the tenant settings Verified SMTP is not always enabled. You can enable this option for a user with the Powershell command: Set-CASMailbox -Identity [login-address] -SmtpClientAuthenticationDisabled $false
In Powershell:
- Install-Module -Name ExchangeOnlineManagement
- Connect-ExchangeOnline -Organization [TENANTID]
- Set-CASMailbox -Identity [login-address] -SmtpClientAuthenticationDisabled $false
3. Create an APP registration in the M365 Azure
Create an App registration (portal.azure.com -> App registrations)
- Give it a name and choose the single tenant option
- In the left menu -> Manage - Authentication and choose Add a platfom => web:
- enter your domainname
- In the left menu -> Manage - Authentication and choose Add redirect URIs:
- https://[SITEURL]/Providers/SmtpOAuthProviders/ExchangeOnline/Authorize.aspx
- https://[SITEURL]
- In the left menu -> Manage - Certificates and Secrets
- Choose New client secret:
- Create a secret and save your key for later use.
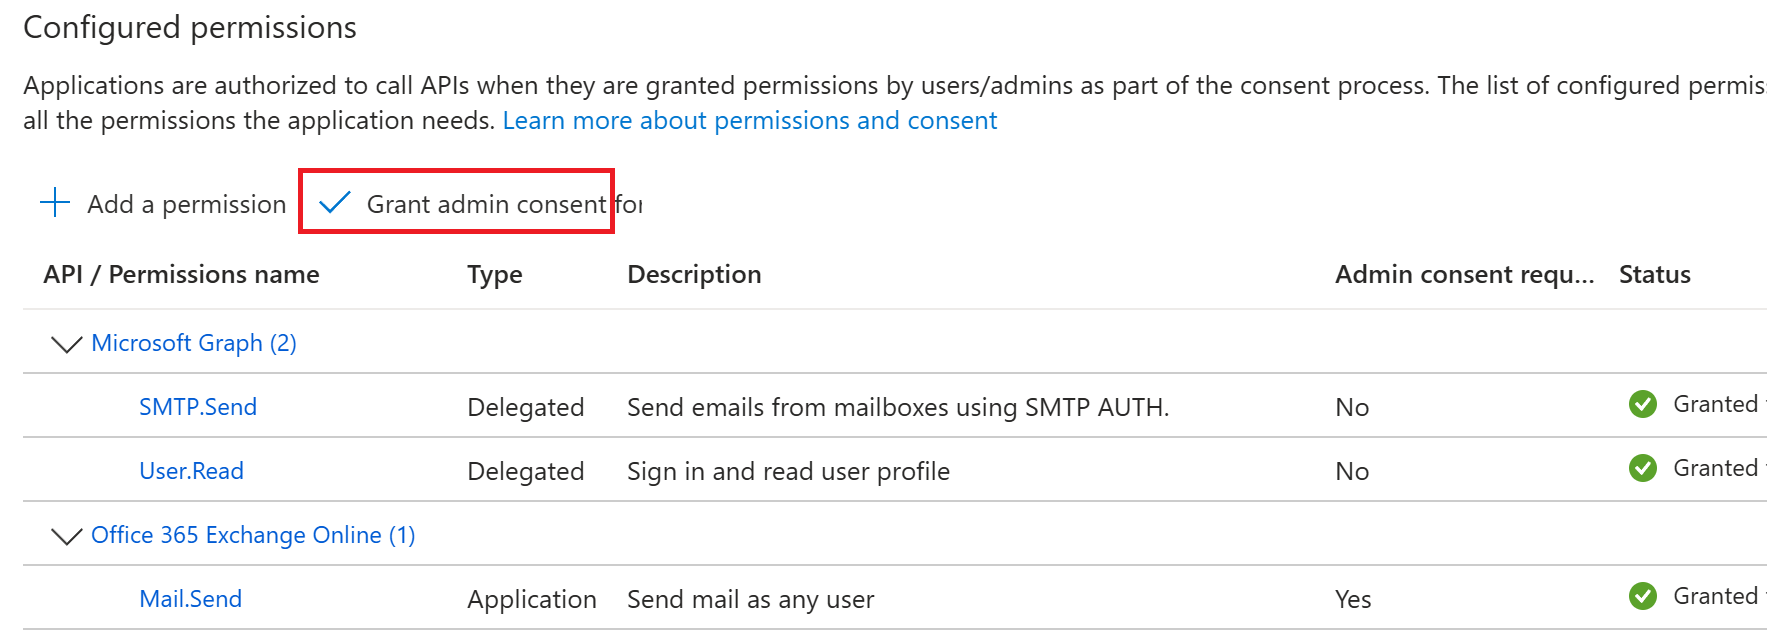
- In the left menu -> Manage - API permissions and choose Add a permission:
- Select Microsoft Graph -> Delegated -> SMTP.Send (Send emails from mailboxes using SMTP AUTH) -> Add permission
- Select APIs my organisation uses -> Office 365 online -> Application permissions ->
Note
Grant admin consent

- In the left menu > Overview
- Copy the Directory (tenant) ID for later use
- Copy the Application (client) ID for later use
4. Grant access to the app to use the mailbox
In Azure:
- Search for Enterprise applications
- Search for application
- Copy the Application ID
- Copy the Object ID
In Powershell:
- Install-Module -Name ExchangeOnlineManagement
- Connect-ExchangeOnline -Organization [TENANTID]
- New-ServicePrincipal -AppId [Application ID] -ObjectId [Oject ID]
- Get-ServicePrincipal | fl
- Copy the value of SID
- Add-MailboxPermission -Identity "[mailaddress]" -User [SID] -AccessRights FullAccess
5. Setup the mailbox in DNN
Personabar - Servers - Server settings
SMTP Server and Port:
- smtp.office365.com:587
SMTP authentication:
- SMTP Authentiaction: OAUTH
- Auth Provider: Exchange Online
- Tenant id: [Your Tenant ID]
- Client id: [Your Client ID]
- Client Secret: [Your Secret]
Click Authorize
Enter your mailbox user credentials
Click Test SMTP Settings to check if the setup is successful.
Your OAuth provider configuration has been completed.