Edit an Article (running DNN Docs Locally on Your Machine)
Prerequisites
Get DNN Docs Running Locally: In order to edit an article you need to get DNN Docs running locally on your machine. Follow the steps on the Get DNN Docs Running Locally page before proceeding.
Markdown: Docs uses markdown syntax to format the docs files. Markdown is simple to pick up on. Familiarize yourself with the Markdown Guide to DocFx before making updates to content.
Now that you've gotten DNN Docs running locally (congrats BTW!) we will talk through the steps for making an edit (in your local repo), previewing the (local) edit, pushing it to your forked repo (on the Github.com website), then creating a Pull Request on the Github.com website. First using Git; second using Visual Studio.
Steps to Edit an Article & Create a Pull Request using Git
Fork the DNN Docs Repo into your own Repo on Github.

Set your remote repositories. We will use the terms "upstream" and "origin". Note: when you originally cloned the repo locally (in the "Getting DNN Docs Running Locally" pre-requisite) the locally cloned repo was named
originimplicitly (as well).Type
git remote add upstream https://github.com/DNNCommunity/DNNDocsto add the main DNN Docs repo as your "upstream" repoNote
Remotes can be named anything you like. Find out your remotes by typing
git remote -vType
git remote -vto list your remotes. If you are new to Git then you should have 2 remotes. Youroriginandupstreamwhereoriginis your forked repo and yourupstreamis the main DNN Docs repo; both on Github.Create an Issue on GitHub that corresponds with the edit you're working on by clicking the "New Issue" button in the browser. Be sure to include relevant information providing context to the issue in the description/comment section. This helps reviewers understand what you're working on.
Make note of the issue number that GitHub generates.
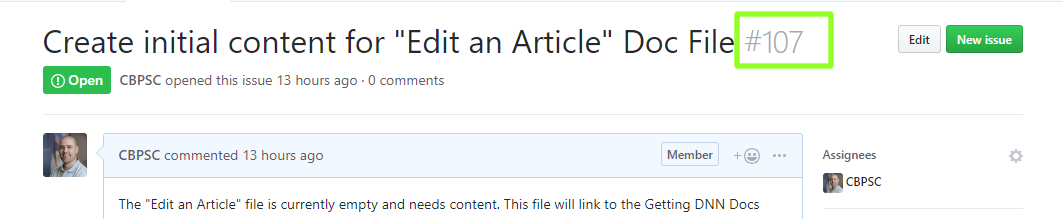
Create a new branch for your work. Typically branch names align with the issue number for ease of tracking.
Example Branch Name:
issue-107Example Git Command to Create New Branch:
git checkout -b issue-107Make your edits
Preview your work locally by invoking the
docfx --servein your terminal (in VS Code, Powershell, etc.). This will run DNN Docs locally on your machine at a URL similar to thislocalhost:8080. Click the link or copy/paste it into your browser.Use
git statusto review the files you are working on and ensure the proper files are being tracked.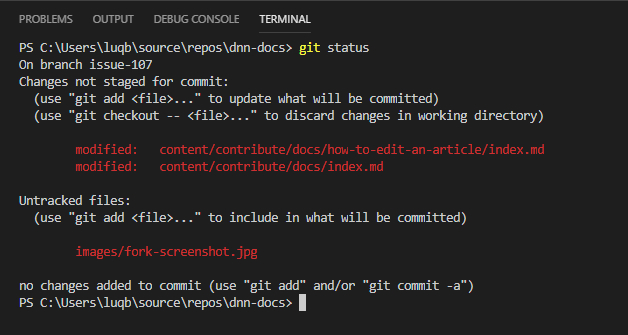
Use
git add [INSERT FILE NAME]to stage a single file orgit add .to stage all modified files to be committed.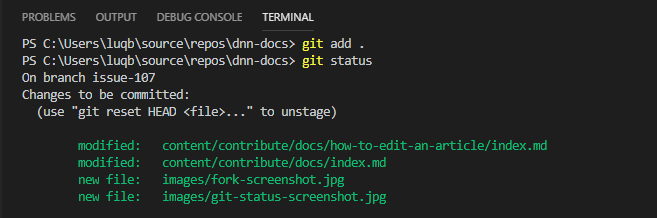
Use
git commit -m [INSERT YOUR COMMIT MESSAGE HERE]to commit your files. The-mstands for "message". Replace the INSERT YOUR COMMIT MESSAGE HERE text with brief and relevant text summarizing your commitUse
git push origin [INSERT A NEW BRANCH NAME HERE]to push your updated files to your remote repo (on Github with nameorigin). Replace the INSERT A NEW BRANCH NAME HERE with the name of your new branch. In this exampleissue-107Go to your forked GitHub repo on GitHub.com. GitHub should detect the updated code and prompt you to make a pull request.
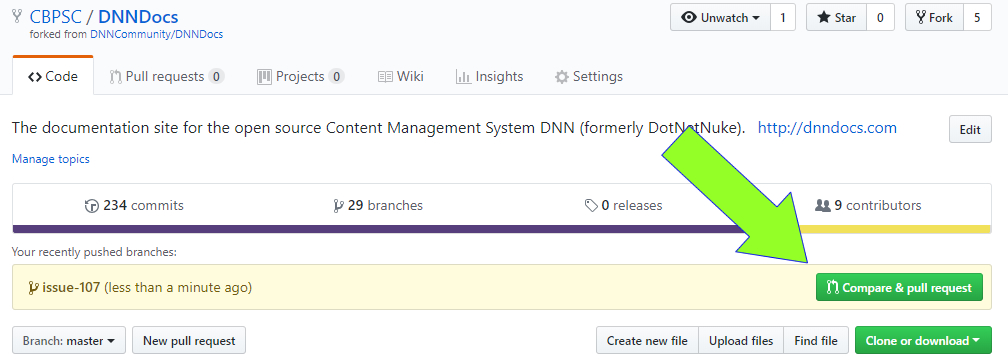
Create a Pull Request on Github.com by clicking the "Compare and Create Pull Request" button. In the description/comments section be sure to include the text "Resolves
#[INSERT ISSUE NUMBER HERE]where your previously created issue number is associated with this pull request.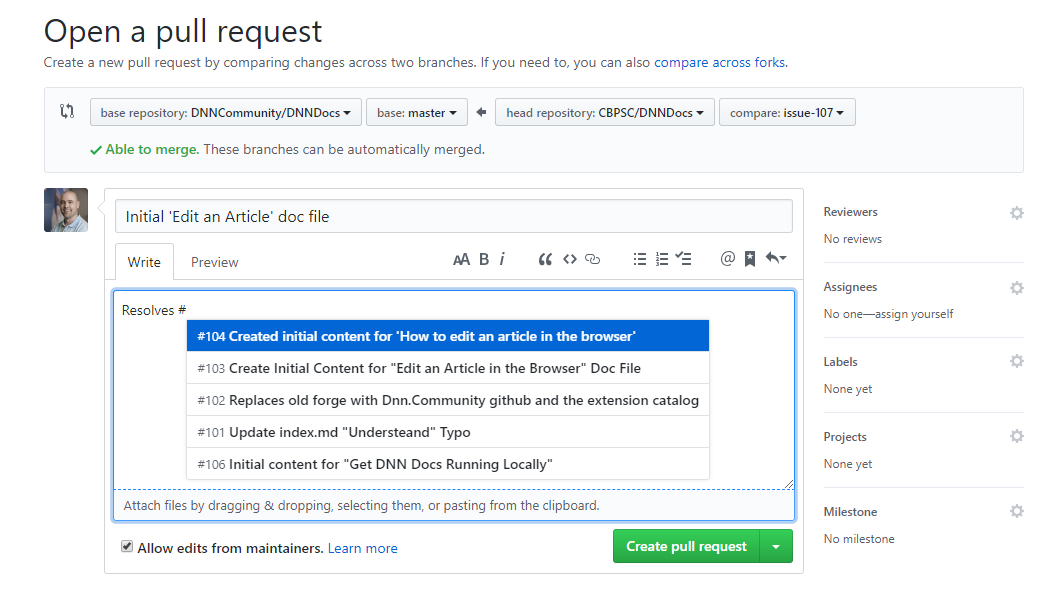
Steps to Edit an Article & Create a Pull Request using Visual Studio
Cloning the repository from Visual Studio, as described on Get DNN Docs Running Locally page, has forked the DNN Docs Repo into your own Repo on Github.
Create an Issue on GitHub that corresponds with the edit you're working on by clicking the "New Issue" button in the browser. Be sure to include relevant information providing context to the issue in the description/comment section. This helps reviewers understand what you're working on.
Make note of the issue number that GitHub generates.
Create a new branch for your work using Visual Studio menu item 'Git...New Branch..'
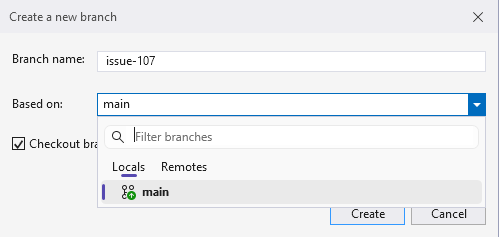
For more elaborate instructions on how to create a new branch in Visual Studio see https://learn.microsoft.com/en-us/visualstudio/version-control/git-create-branch?view=visualstudio.
Make your edits.
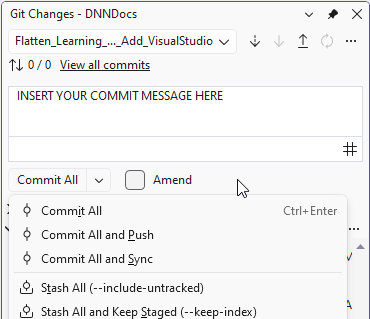
Preview your work and files locally using the 'Git Changes' tab in Visual Studio.

Commit the changed and added files by clicking 'Commit All and Push'.
Go to your forked GitHub repo on GitHub.com. GitHub should detect the updated code and prompt you to make a pull request.
Create a Pull Request on Github.com by clicking the "Compare and Create Pull Request" button. In the description/comments section be sure to include the text "Resolves
#[INSERT ISSUE NUMBER HERE]where your previously created issue number is associated with this pull request.
Tip
Want more info on Git? Check out the free, online GitBook