Enable and Set Up IIS
Prerequisites
DNN installed with folder permissions for the user account that will run your website.
Steps
- Enable IIS.
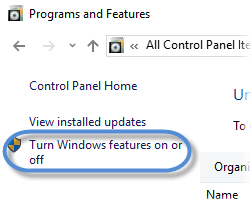
Go to Control Panel > Programs and Features > Turn Windows features on or off.
Under Internet Information Services, turn on the following:
- Web Management Tools: IIS Management Console
- World Wide Web Services
- Application Development Features: ASP.NET 3.5 and 4.6
- Common HTTP Features: Default Document and Static Content
- (Optional) Security: Basic Authentication
- Internet Information Services Hostable Web Core

You can create a new website or set up an existing one for use with DNN. Choose one of the next two steps.
To create a new website and point it to the DNN installation folder:
Go to Control Panel > Administrative Tools > Internet Information Services (IIS) Manager.
In the Connections panel, expand your host tree, right-click on Sites, and choose Add Website.

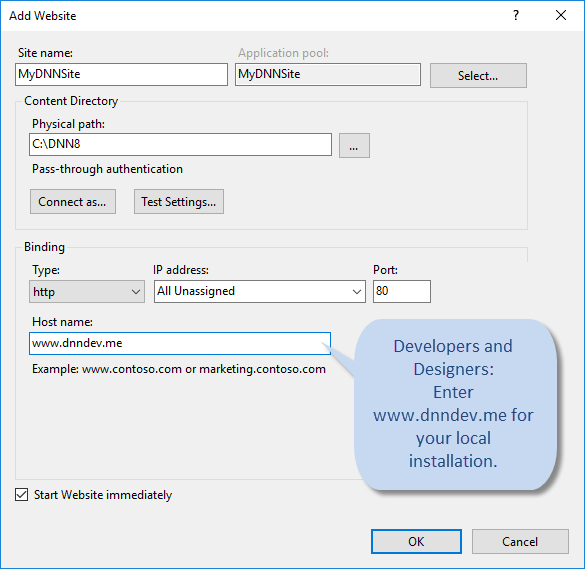
Enter the new website's name and choose the location.
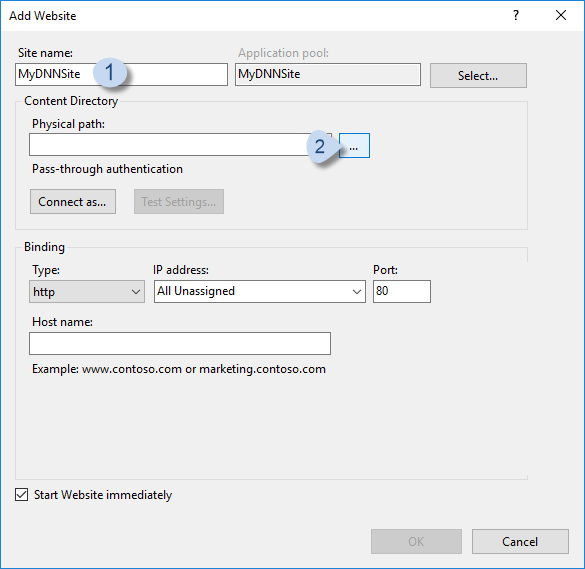
Enter the Host name.
Developers and Designers: If setting up a local development environment, you can use
www.dnndev.me(or any subdomain). DNNDEV.ME is a registered domain which points to the loopback address of 127.0.0.1, so it will always resolve locally.Administrators: If setting up a live website, use your website's domain.
To use an existing IIS website:
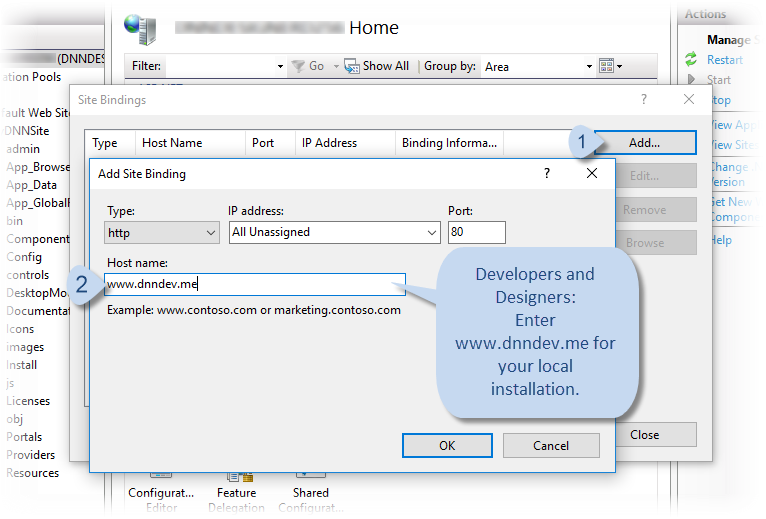
In the Connections panel, right-click on the name of the existing website, and choose Edit Bindings....
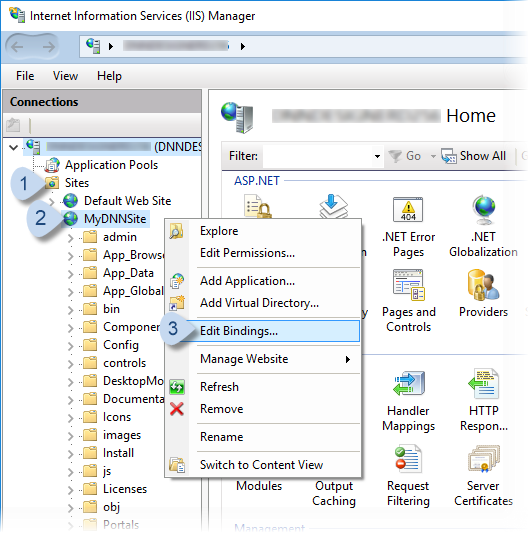
In Site Bindings, click/tap Add.... In Add Site Binding, enter the Host name.
Developers and Designers: If setting up a local development environment, you can use
www.dnndev.me(or any subdomain). DNNDEV.ME is a registered domain which points to the loopback address of 127.0.0.1, so it will always resolve locally.Administrators: If setting up a live website, use your website's domain.
If you do not use NETWORK SERVICE as the user account to run your website, verify that IIS AppPool\AppPoolName has Full or Modify permissions for the DNN installation folder.
The account IIS AppPool\AppPoolName is automatically created by IIS.
Note
For security best practices, you should use either an App Pool Identity or an individual machine/AD account (often used by Control Panels) - not a Network Service. An App Pool represents a way to separate web applications from one another and prevents them from harming each other or their environments. Thus, you should generally only assign one worker process to one App Pool.