Run the DNN Installation Wizard

Prerequisites
- DNN installed with folder permissions for the user account that will run your website.
- IIS enabled and set up.
- SQL installed and set up.
Steps
Run the DNN Installation Wizard.
Open your website (
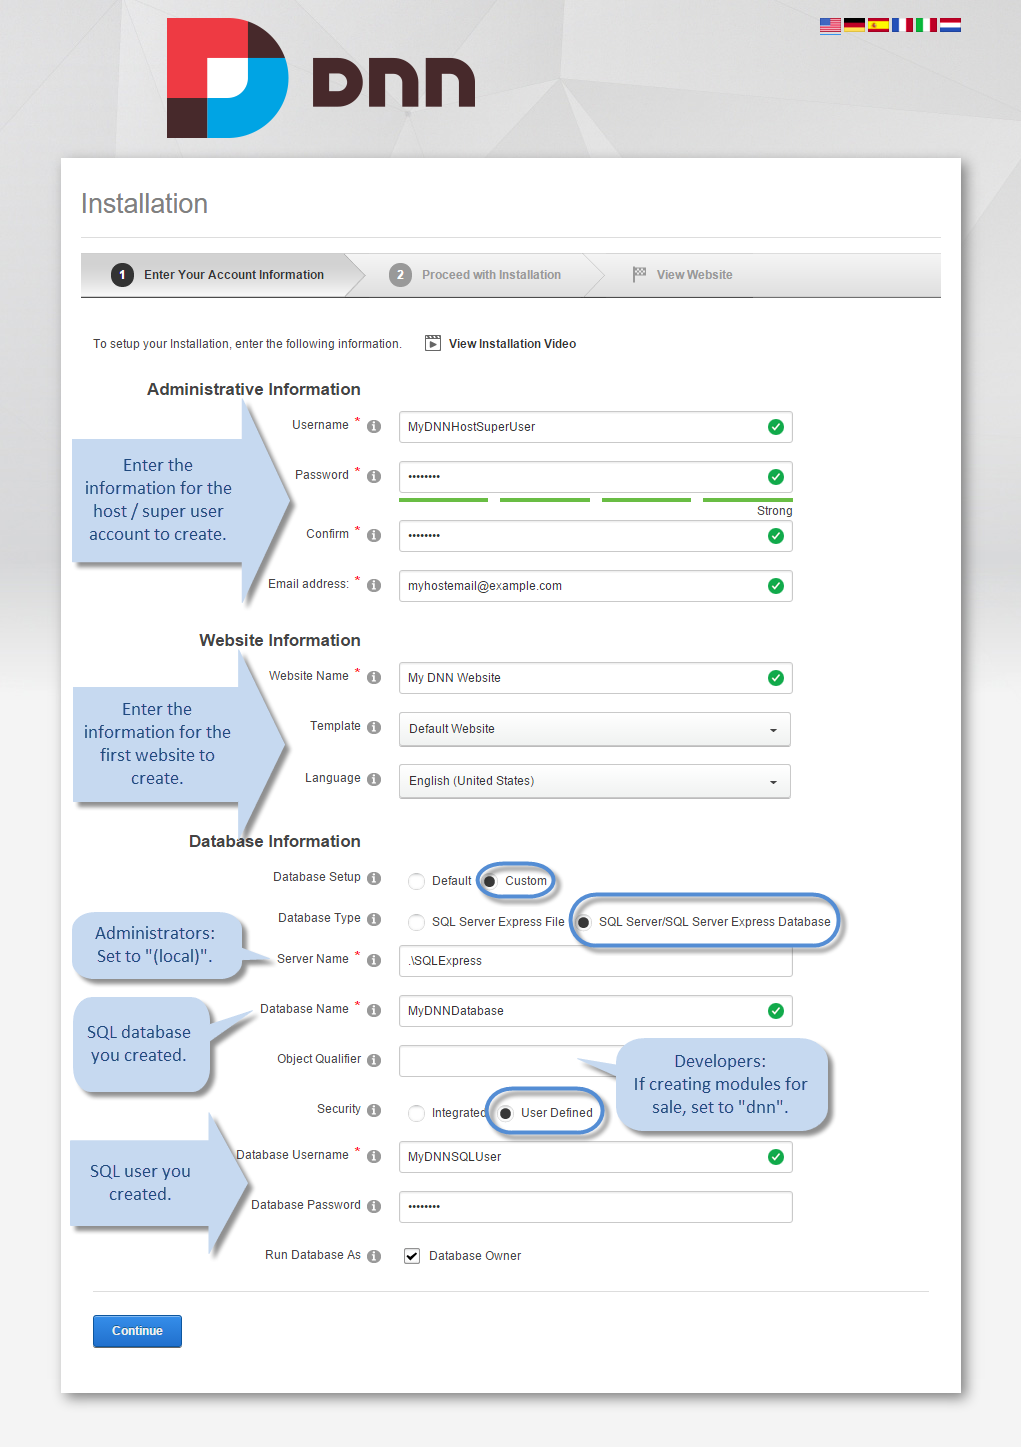
https://www.dnndev.me) in a browser.Under Administrative Information, enter the username, password, and email address for the host / super user account to create. This account will have permissions for all websites created in this DNN installation.
Note
Remember the host's username and password, which you will need to manage your websites.
Under Website Information, enter the name, template, and language to use for the first website.
Set the Database Information options.
Database Setup: Custom
Database Type: SQL Server/SQL Server Express Database
Server Name:
Developers and Designers: You can use the default value (example:
.\SQLExpressor(local)).Administrators: Set the value to
(local).Database Name: Enter the name of the SQL database you created earlier.
Object Qualifier:
Developers:
- If creating modules for your own websites, set objectQualifier to blank.
- If creating modules for sale, set objectQualifier to
dnnto prependdnn_to all DNN-generated objects, such as tables and stored procedures. This practice is recommended in your local development environment, so that you can catch name-matching errors that could occur if the target DNN installation's objectQualifier setting (found in web.config) is not blank.
Security: User Defined
For Database Username / Password, enter the information for the SQL user you created earlier.
Follow the prompts to the end of the wizard.
Test the installation by viewing the first website.
(Optional) To assist with localization, modify the web.config file to set
ShowMissingKeystotrue.<add key="ShowMissingKeys" value="true" />If set to TRUE,
- Any localized text in DNN will be displayed with an "L" in front of it to help with translating text in your module.
- DNN displays an error if the localized version of a string is missing from the resource files. The resource files are XML files that contain the localized string tables.